1970 TUBBED WAGON

This Project has been sitting on the backburner for nearly 20 years. I decided rather than doing a complete frame off resto at this time, I would at least make it drivable until I can circle back and do it right. I have some other projects infront of it like the "Super Wagon project.
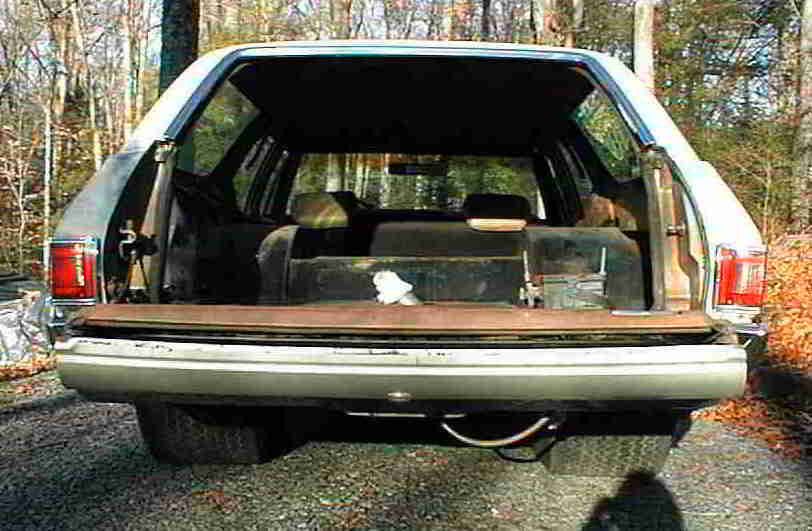
So this 70 wagon is a Concours Estate. I got it already tubbed, S&W rear suspension, 16 gallon fuel cell, and rack & pinion steerinng from the previous owner. It had a 350 in it that I sold and now over the 2020 Covid Christmas break I dropped in a 454 that came out of a 70 Monte Carlo. It currently has a TH350 as long as it holds up, I have a built TH400 if it goes south. This 12 Bolt Posi has a Brut Strength rear diff, Richmond 411 gears and Moser axils. I just added (1/2021) rear disc brakes to make it 4 wheel discs. I will detail this further on.
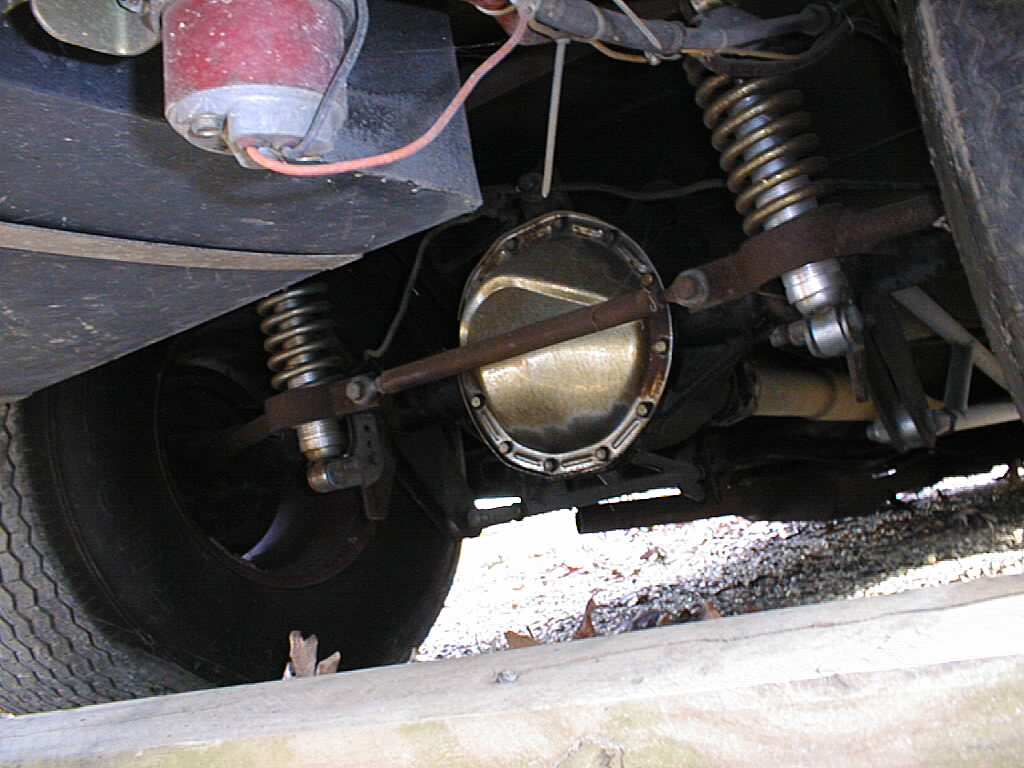
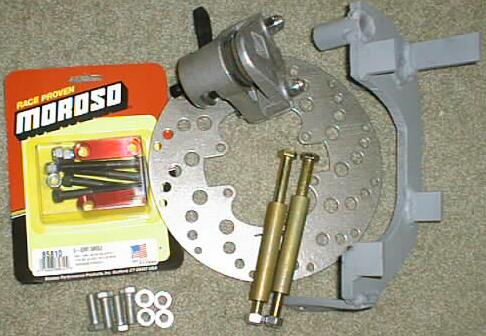
My invented Pinion Mounted Parking Brake. This tubbed application brought about the necessity to create this parking brake. The large offset rear wheels did not allow the capability of using the factory parking brake cables. This parking brake location solves that problem. Looks pretty trick too!
'72 Pinto Manual Rack and Pinion
Body mod plans for the wagon.
I wanted to do something different so here are my plans. the top image is a normal 70 wagon. the middle image was what I thought I wanted t do for a very long time, but now rather than usinng the side of a 2 door coupe and filling in the long wagon quarter windows, I want to do what is shown in the bottom image which is using 68 chevelle 2 door doors (because I love the vent windows and the body curves of the 68 doors match the fenders of the wagons. The small quarter window is from a 68-72 convertible. These convertible quarter windows match the angle of the long wagon window and looks more asteticaly pleasing to me. This way I can keep the long windows and better visability. I have all the donor parts to make this happen.

text
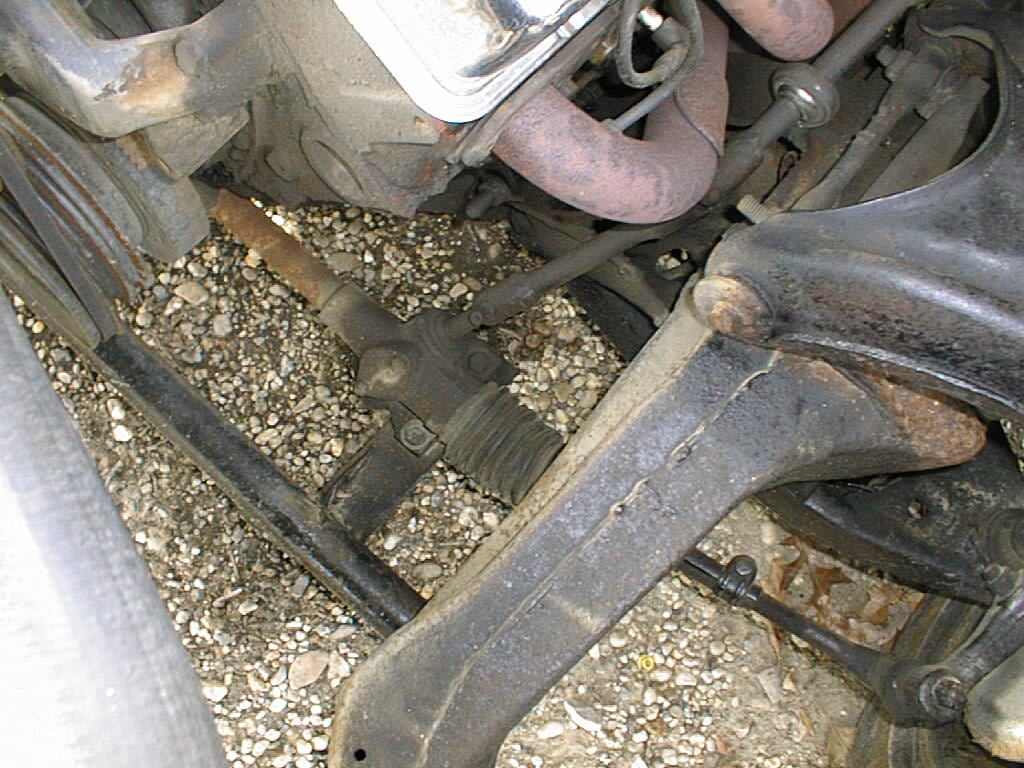
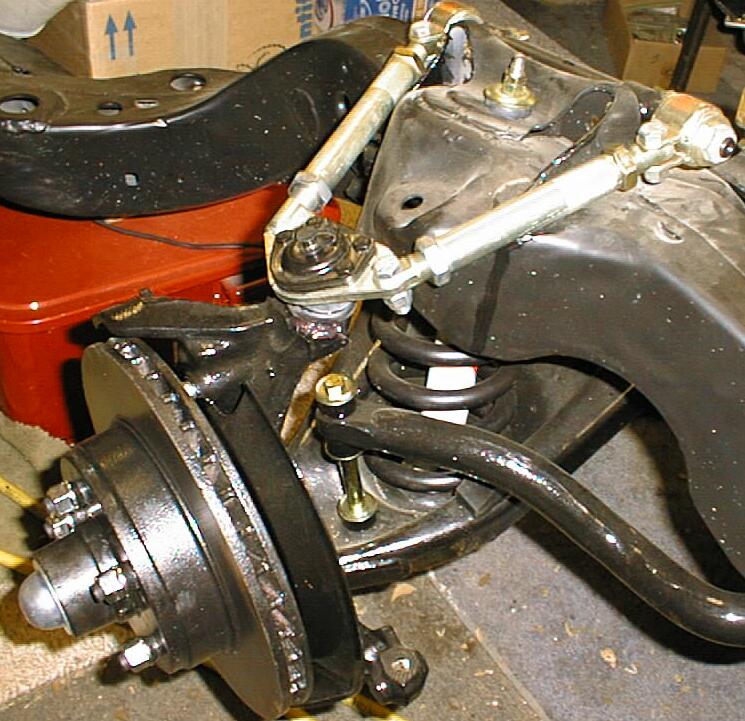
To mount the b-body spindles in the Chevelle lower control arms, the b-body ball joints must be turned down to 2.012” diameter in order to be press fit in the arms. Before the lower arms can me installed, the motor-frame mounts must be installed because the arms will block access to the brackets hardware. Next I pressed the new polygraphite bushings in. I prefer the graphite impregnated polyurethane over the straight polyurethane because it reduces the squeaking caused by no lubrication between the rubber and steel parts. Don’t forget to use the Formula 5 grease between the inner collars and the urethane bushings. After using the armor coated hardware kit I have also put together to mount the lower arms into the frame, the spindles are ready to be put on. Don’t tighten the bolts until all the vehicles weight is sitting on the suspension. The poly bushings need to rotate freely, without binding until the actual ride height is achieved before locking them down.
I have purchased new front springs with a 2-inch drop for my application. It is now time to look at the upper control arms. With the B-body spindle conversion, the spindle is taller, which changes the geometry of the upper control arms. Some people use offset shafts and lots of shims to compensate, other companies make shorter control arms specifically for this conversion. However, I found polepositionrp.com (888) 303-8555.
I ordered 9200M5 (8.25” –10”) w/metric steel cross shaft/ bolt in ball joint plate, requested: 5” & 6” sleeves w/ midsized plate and 6.5” cross shaft centers with OE pivots. These arms give all the versatility in adjustment with out requiring any shims. No shims give you the shortest distance between the arms pivot point and the ball-joint center. This equates to maximum camber roll on hard cornering, which makes the most use of the B-body spindles handling potential. The adjustable arms make doing alignments so much easier. Pole Position also offers home alignment kits. To mount the spindle to the upper arms just use the stock B-body upper ball-joint. The outmost ends of the brackets that are welded to the frame to mount the upper control arm shafts need to be bent in slightly to allow the upper arms to achieve maximum travel before hitting the frame.

This picture is to show where the brackets get bent in to clear upper control arms. The 2 places are located by the small pieces of white chalk. The area was freshly painted again because the paint chipped after hammering on it. If I’d have known, I’d have done this step prior to galvanizing and painting.

The ’70 Chevelle calipers fit these spindles without any modification. You can use ’69 Camaro front disk brake hoses with the Chevelle drum brake hose frame brackets, they are a few inches longer. Be sure to use the correct “Banjo” bolt. Napa #82701 is 1.1” long. You can also use ’78 Camaro hoses but you will need to use Banjo bolt Auto Zone # 313935 which is .9” long. The ’78 Camaro hoses are cheaper and do not have to be special ordered. I found this out after already purchasing my ’69 hoses, so that’s what I used. Or you could just use the stock Chevelle frame bracket and hoses.